Scaling Up and Down
IBM Cloudant Standard allows your database service’s provisioned capacity to be altered dynamically to reflect changes in your application’s demand. That is, you can allow your application to send more traffic to Cloudant by telling Cloudant ahead of time that you need extra capacity.
The simplest way to alter capacity is to manually adjust the slider left and right in the IBM Cloud dashboard, hitting the “Update Capacity” when you’re happy:
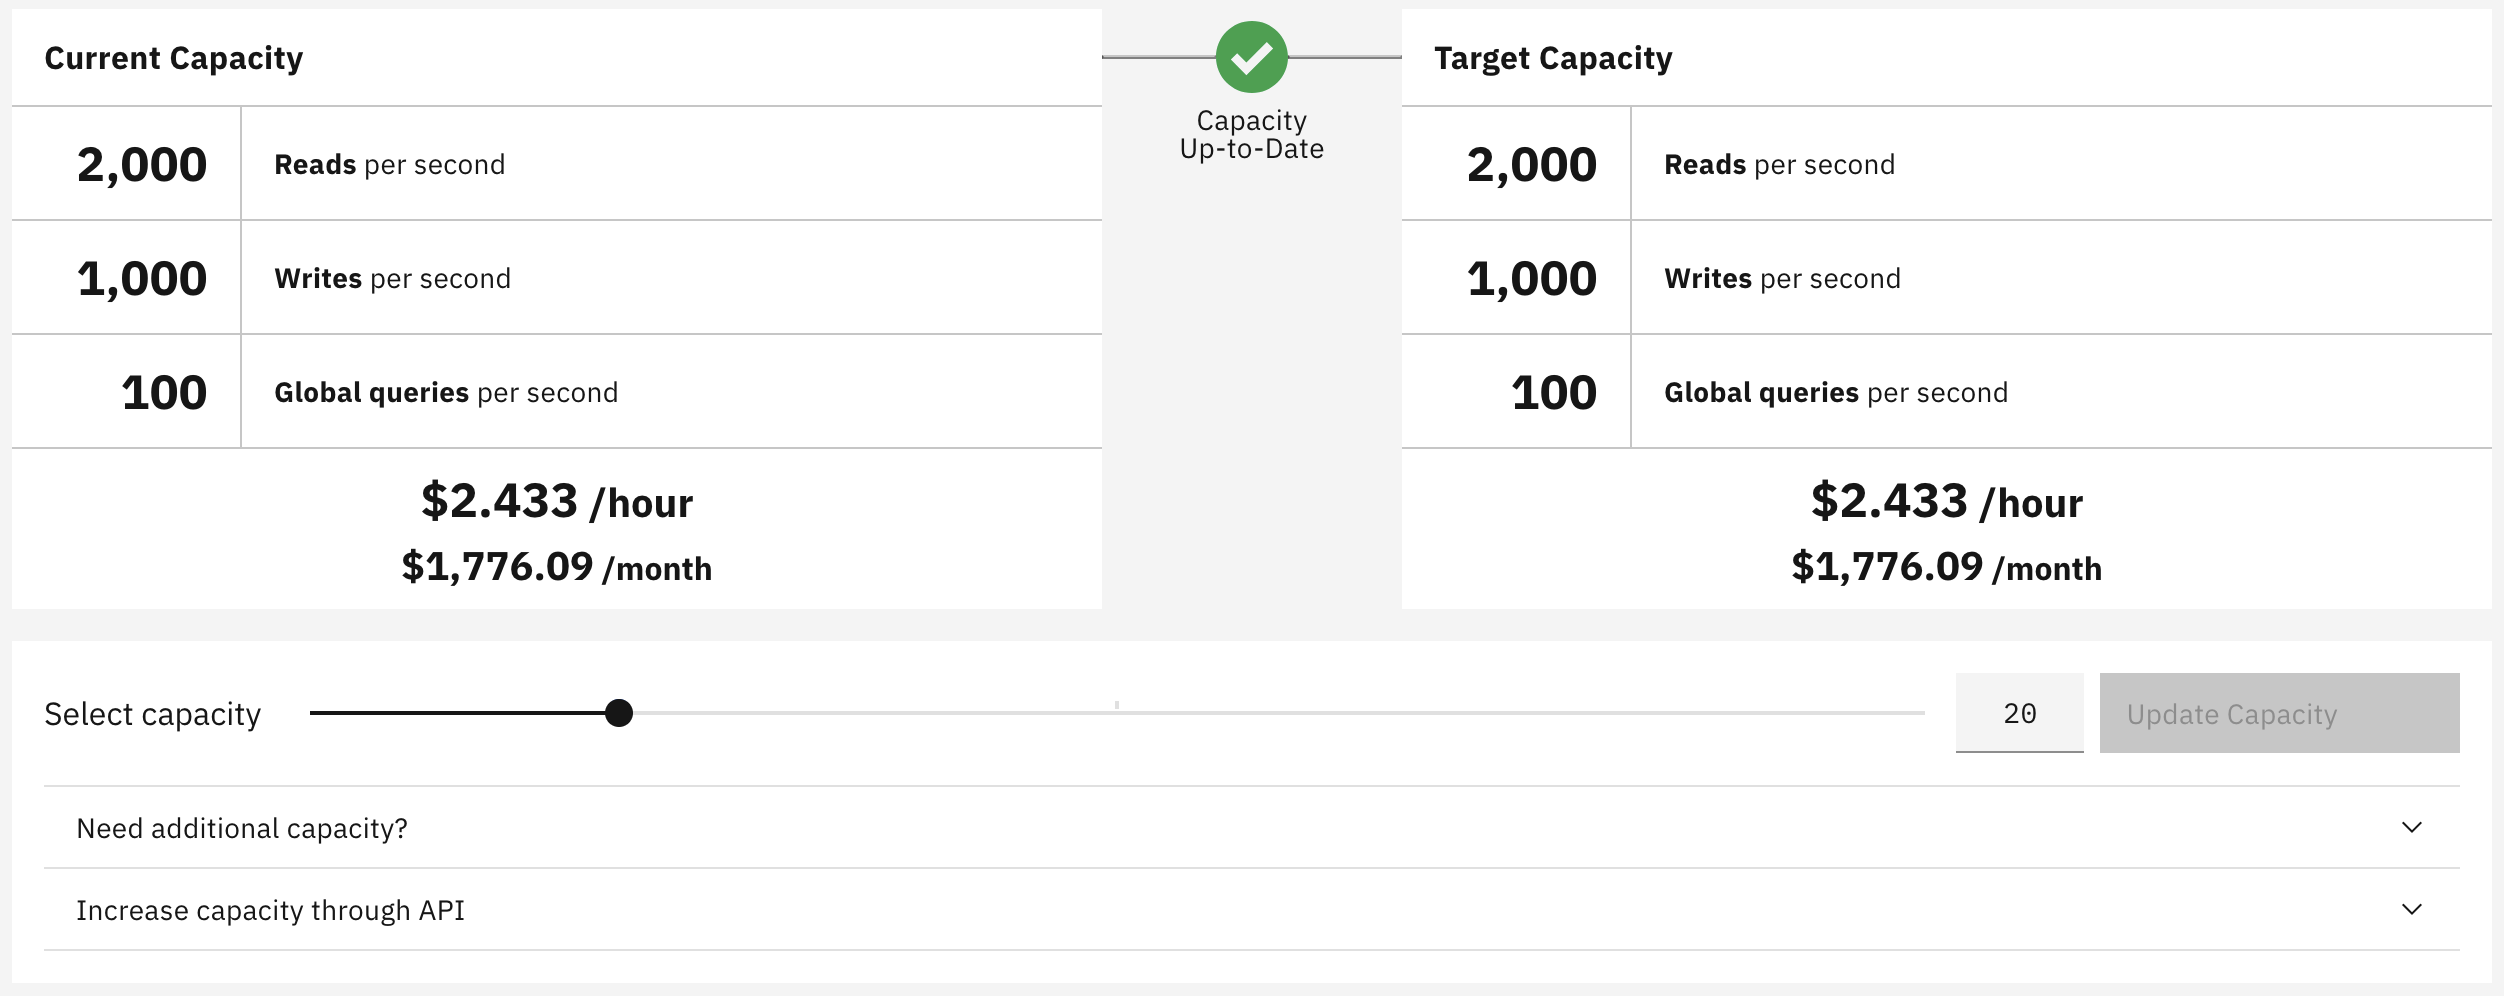
The slider allows a number “blocks” of capacity between 1 and 100 units to be selected. Small changes in capacity will be be provisioned in a matter of minutes - larger leaps may take longer.

Photo by Dylan McLeod on Unsplash
Programmatically getting a Cloudant instance’s capacity🔗
Using the Cloudant Node SDK we can write a simple script to fetch the current capacity of our Cloudant instance.
We create a new project with:
mkdir cloudant_capacity
cd cloudant_capacity
npm init
then install the SDK with:
npm install --save @ibm-cloud/cloudant
Then create our get_capacity.mjs file:
import { CloudantV1 } from '@ibm-cloud/cloudant'

const service = CloudantV1.newInstance({})

const getCapacity = async () => {
  const response = await service.getCapacityThroughputInformation()
  return response.result
}

const main = async () => {
  // get the current capacity of a Cloudant instance
  const capacity = await getCapacity()
  console.log(capacity)
}

main()
We configure the script using environment variables as documented here, depending which flavour of authentication that is to be used. We’ll assume IAM authentication from now on.
Running this script should produce the output of this form:
export CLOUDANT_URL="https://myinstance.cloudant.com"
export CLOUDANT_APIKEY="MYAPIKEY"
node get_capacity.mjs
{ current: { throughput: { blocks: 1, query: 5, read: 100, write: 50 } } }
- this Cloudant instance is sized at 1 “blocks” - each block accounts for 5 queries, 50 writes and 100 read operations per second.
- the current throughput is also listed in terms of the number reads/writes/queries per second that are allowed for this instance.
- if the plan is currently being resized, the returned object will also contain a
targetobject as well as acurrentobject, indicating the size of the Cloudant plan that Cloudant will aim to achieve in due course. See the API reference for more information.
Note if you are on a Cloudant Lite plan, then the
blocksattribute will not be indicated. Lite plans cannot be programmatically modified - they must be first be converted to a billing-enabled Cloudant Standard plan.
Programmatically setting a Cloudant instance’s capacity🔗
Setting the capacity of a Cloudant instance is as simple as informing Cloudant how many “blocks” that are to be provisioned. Each block equates to 5 queries, 50 writes and 100 read operations per second of added capacity, with the billing increasing linearly with each block.
We can copy our get_capacity.mjs script to set_capacity.mjs and extend it to allow the setting of target capacity:
import { CloudantV1 } from '@ibm-cloud/cloudant'

const service = CloudantV1.newInstance({})

const getCapacity = async () => {
  const response = await service.getCapacityThroughputInformation()
  return response.result
}

const setCapacity = async (blocks) => {
  const response = await service.putCapacityThroughputConfiguration({
    blocks,
  })
  return response.result
}

const main = async () => {
  // set the capacity of a Cloudant instance to 2 blocks
  const response = await setCapacity(2)
  console.log('capacity change response', response)
}

main()
This will produce the output:
node set_capacity.mjs
capacity change response {
  current: { throughput: { blocks: 1, query: 5, read: 100, write: 50 } },
  target: { throughput: { blocks: 2, query: 10, read: 200, write: 100 } }
}
The reponse shows that our plan is currently sized at 1 block but is targeted to expand to 2 blocks. This process may take a few minutes and shortly the current size should reach the target.
If the plan is being expanded by more than a handful of blocks, the plan may gradually expand to meet the target over a few minutes. The progress can be tracked by polling the getCapacity API every minute or so until the target is reached.
Note: When using a Cloudant instance on the Lite plan, attempting to set the capacity will fail with a HTTP 400 response. First upgrade the instance to a Cloudant Standard plan.
Why would I want to do this?🔗
Many customers pick a plan size and leave it like that. A plan size is usually set such that it is just above the level of peak traffic that an application will typically send to Cloudant. If traffic occasionally spikes above the maximum, then the application may get some HTTP 429 responses, to indicate that the capacity limit has been exceed - these requests can be retried a little later.
But some customers have predictable, but non-constant traffic e.g.:
- Busy in the day time, not much at night.
- Busy during the week, not much over the weekend.
- Busy during the holiday season, less so in the new year.
Being able to programmatically tweak the plan upwards or downwards can make sure your application has enough capacity to deal with the peaks and can save money by scaling back the plan size in the quiet times. It can be as simple as writing a one-line “bash” script to change the plan at different times:
#!/bin/bash

# assumes the presence of COUCH_URL & IAM_API_KEY environment variables
# Ref: https://cloud.ibm.com/apidocs/cloudant#putcapacitythroughputconfiguration
ccurl -X PUT -d '{"blocks": 2}' /_api/v2/user/capacity/throughput
Note: the above script assumes the Node.js script ccurl is installed and environment variables are present to provide the URL and API key to be used to communicate with Cloudant.