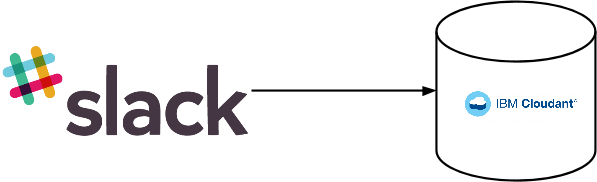
Slack to Cloudant
Slack’s Integration API and Cloudant’s HTTP API make it simple to store data directly into a Cloudant database without breaking a sweat. This tutorial shows how to create a custom slash command in Slack and how to post it directly to Cloudant.
Slack is a messaging and team-working application that is used widely to allow disparate teams of people to chat, share files, and interact on desktop, tablet, and mobile platforms. We use Slack in IBM Cloud Data Services to coordinate our activities, to work in an open collaborative environment, and to cut down on email and meetings.
One of the strengths of Slack is that it integrates with other web services, so events happening in Github or Stack Overflow can be surfaced in the appropriate Slack channels. Slack also has an API that lets you create custom integrations. The simplest of these is slash commands: when a user starts a Slack message with a forward slash followed by a command string, Slack can be configured to POST that data to an external API. Say you create the slash command /lunch. A user could type:
/lunch pepperoni pizza and fanta
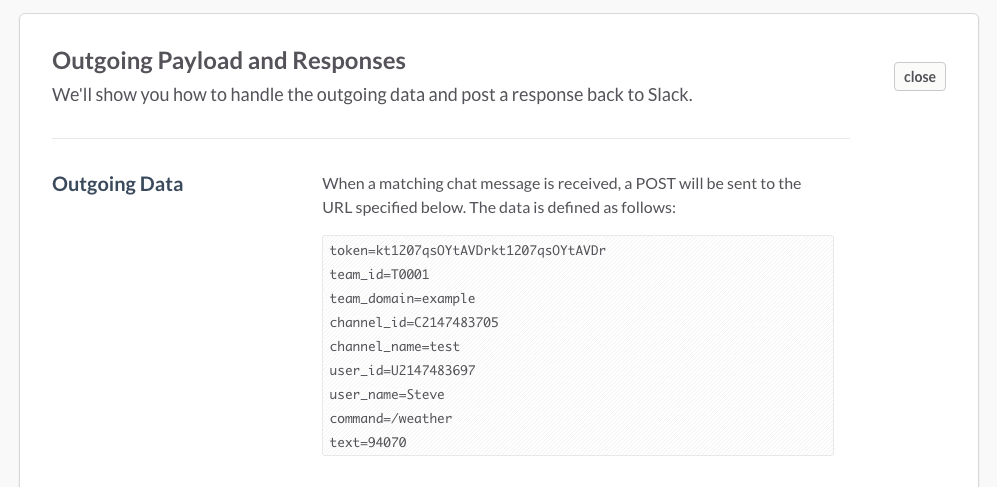
When they do so, Slack makes an HTTP POST to any URL you specify with some data that identifies who issued the command, in which channel:
token=kt1207qsOYtAVDrkt1207qsOYtAVDr
team_id=T0001
team_domain=example
channel_id=C2147483705
channel_name=test
user_id=U2147483697
user_name=Steve
command=/lunch
text=pepperoni pizza and fanta
All you need to do is create an API service, build an application, handle the post, and then store the data in your database.

But there is a simpler way. Because IBM Cloudant is a cloud-based, NoSQL database that has an HTTP API, you can cut out the middle layer and post data directly into Cloudant:
This blog post shows you how to create a new Slash Command from scratch and how to get the data stored in Cloudant.
Create the command in Slack
- Log into the Slack website.
- On the top left of the screen, click the menu and choose Configure Integrations.
- Scroll to the bottom of the page and click Slash Commands. Tip: You can also get here via this URL: https://YOURACCOUNTNAME.slack.com//services/new/slash-commands
The following form appears:
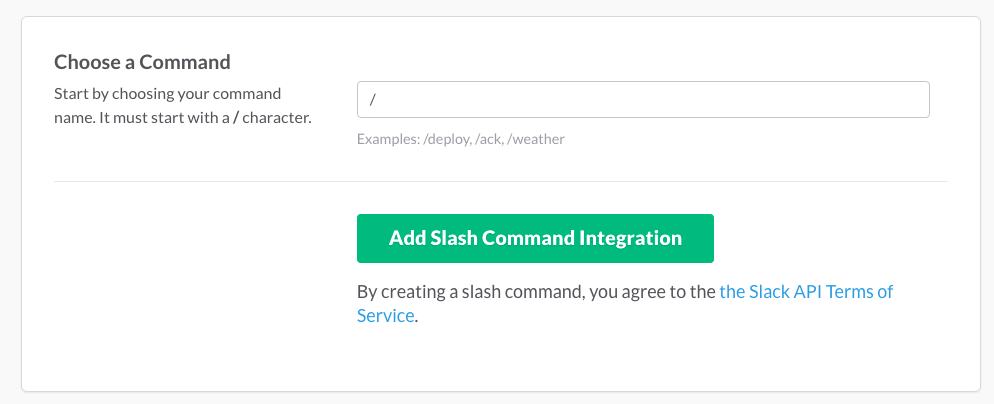
- Enter the command you want to create, like /lunch
- Click Add Slash Command Integration.
Slack sets up this service, and shows you the token that will be transmitted in every post originating from this Slack command. Make a note of this token, as we’ll need it later when we set up Cloudant.
We will come back to this page shortly, after we’ve set up Cloudant.
Set up Cloudant🔗
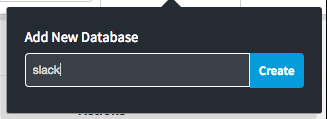
Sign up for a Cloudant account and log into your Cloudant Dashboard. In the Dashboard, create a new database called ‘slack’:
As Slack doesn’t integrate directly with the CouchDB/Cloudant API, we need to direct the posted data to an Update Handler Function. This is a mechanism in CouchDB/Cloudant that allows custom HTTP requests to be handled by a JavaScript before being written to the database. In our case we want to only accept requests that contain the correct Slack security token, so our code looks like this:
function(doc, req) {
  // only accept valid requests containing the token
  if (req.form.token == 'YOUR_REV_TOKEN') {

    // create a new object with the data to save
    var d = req.form;

    // remove the token, so it's not saved
    delete d.token;

    // add a timestamp
    d.timestamp = new Date().getTime();

    // and a unique id
    d._id = req.uuid;

    // instruct Cloudant to save it
    return [d, JSON.stringify({ok: true})];

  } else {

    // don't save anything
    return [null, JSON.stringify({ok: false})];
  }
};
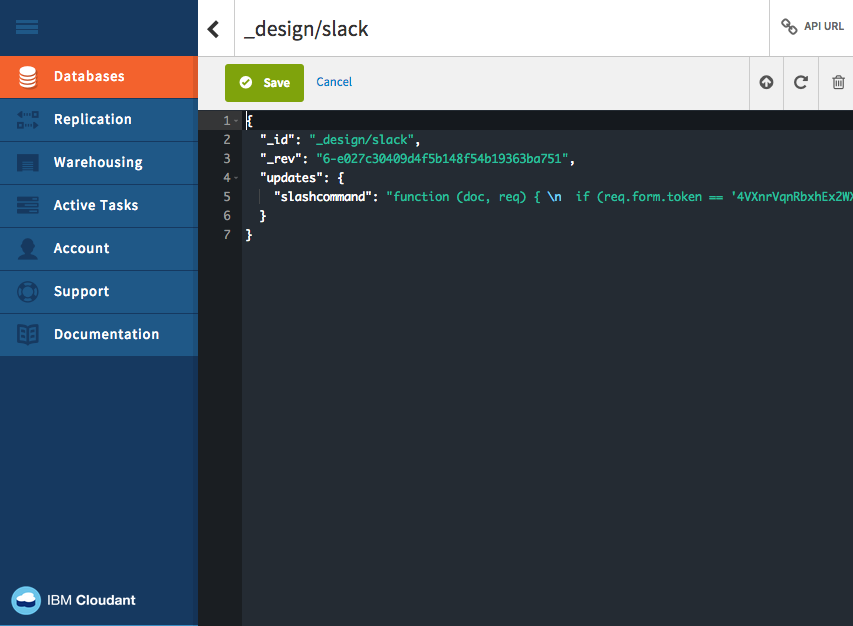
Converting that function into a JSON string, we get the following code. In Cloudant, create a Design Document in your slack database, and copy this code into it, replacing YOUR_REV_TOKEN with the token you got from Slack:
{
  "_id": "_design/slack",
  "updates": {
    "slashcommand": "function (doc, req) { n  if (req.form.token == 'YOUR_REV_TOKEN') {  n    var d = req.form;  n    delete d.token; n    d.timestamp = new Date().getTime(); n    d._id = req.uuid;n    return [d, JSON.stringify({ok: true})]; n  } else {n    return [null, JSON.stringify({ok: false})];n  }n}"
  }
}
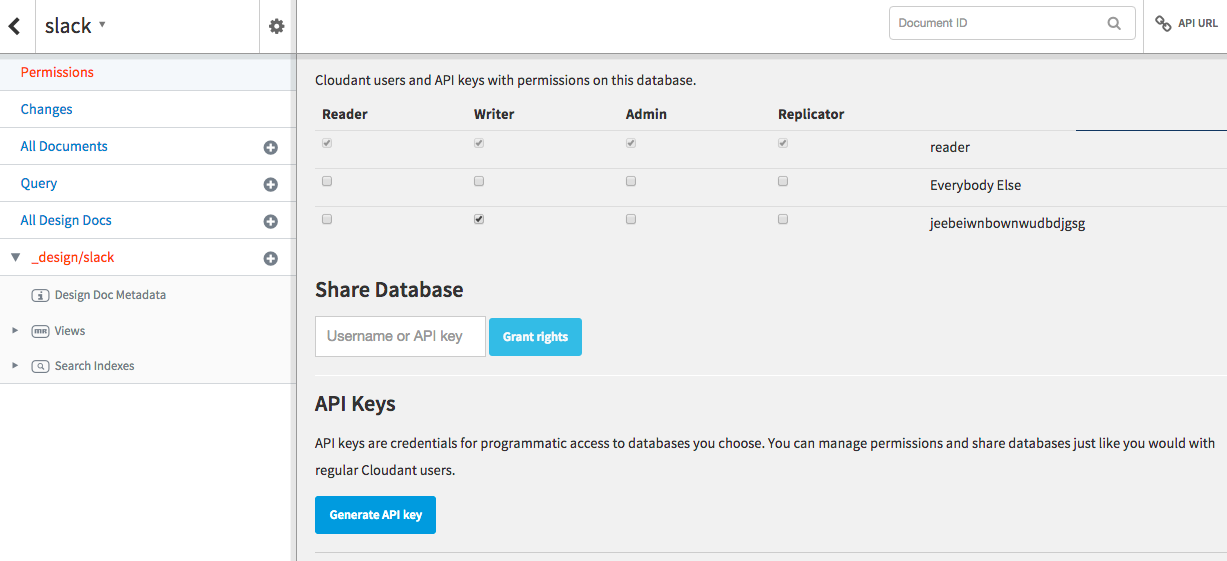
The last thing to do on the Cloudant side is create a Cloudant API key that has write access to the slack database. In your Cloudant Slash database, click Permissions, then click Generate API Key. Turn on the Writer checkbox for the newly generated key. Make a note of the API Key and password for the final step.
Finish off the Slack integration🔗
Back in the Slack Integration Settings page, enter the URL of the Cloudant update handler, substituting the placeholder text in capitals with the details from Cloudant:
https://APIKEY:PASSWORD@SUBDOMAIN.cloudant.com/slack/_design/slack/_update/slashcommand
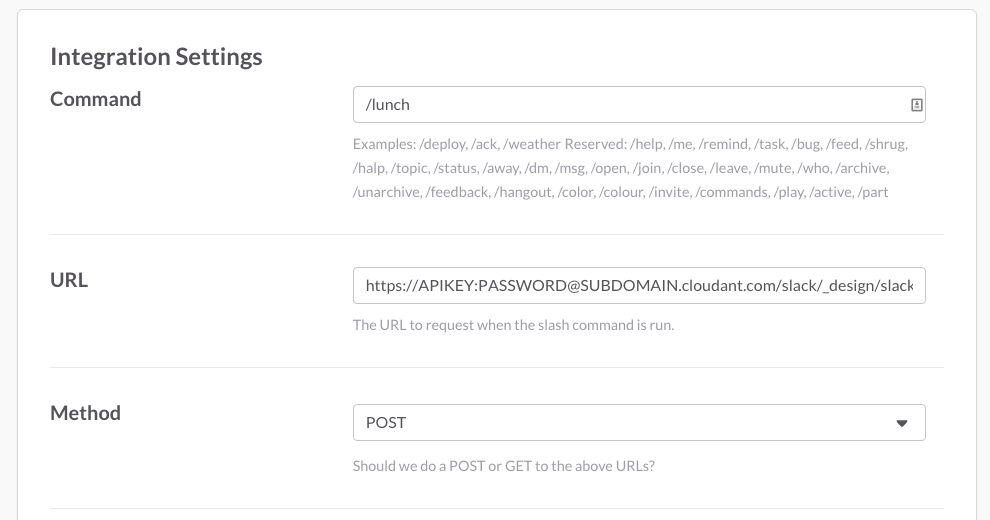
Then click Save Integration.
Test!🔗
Now in any Slack channel, you should be able to issue a /lunch command:

And see the reply that was returned by the Cloudant Update Handler function:

Conclusion🔗
With a simple Update Handler function, you can configure slack to store data in Cloudant whenever a user issues a custom slash command. What will you do with the data? Create a lunch-ordering system, time-keeper, bug-tracker, or anything else you can dream up. It’s up to you!